Build your venue map
Lay out every booth on a map, so vendors know their spot and visitors can find them. Follow these short guides in order.
What you'll get: a map of your venue with every booth on it. Vendors see which spot is theirs, and visitors use it on your event page to find vendors.
Each guide below is one short job with a clip. Do them in order the first time.
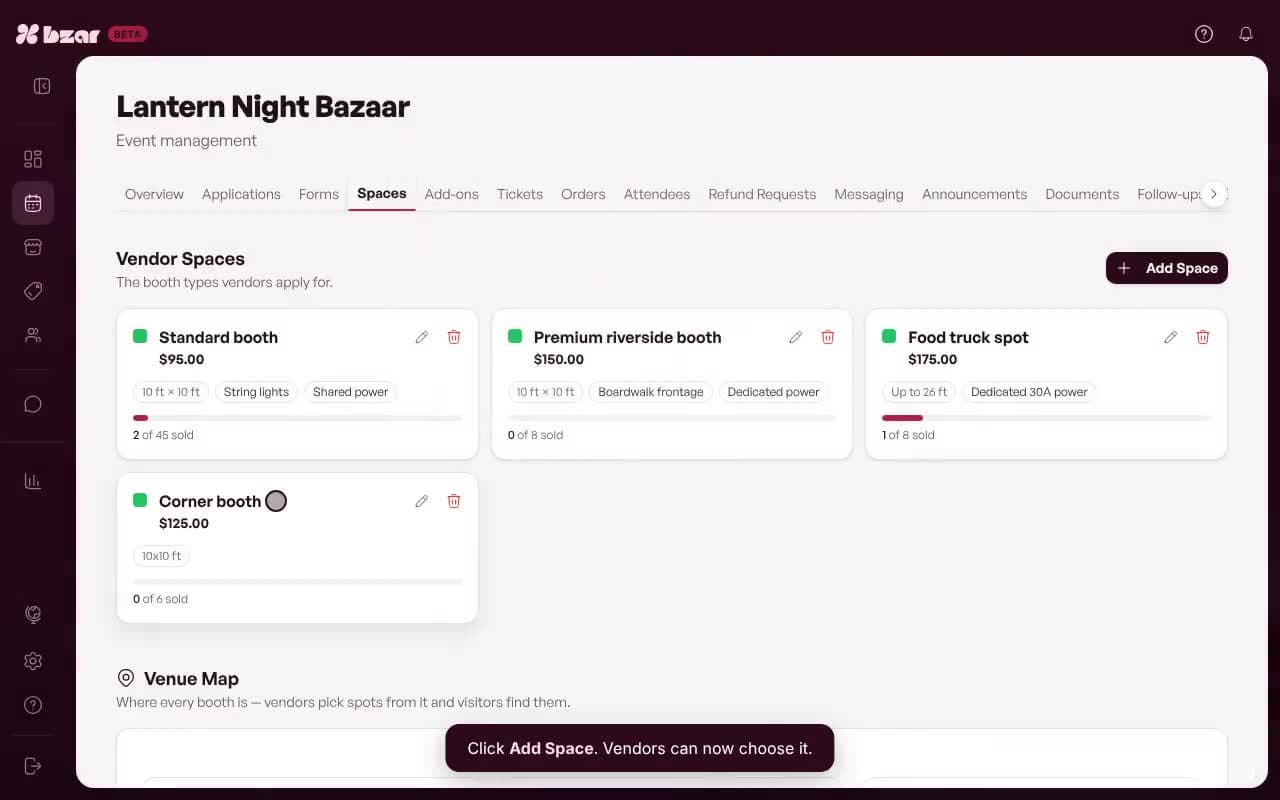
1. Set up space types
Booth sizes, prices and how many you sell.
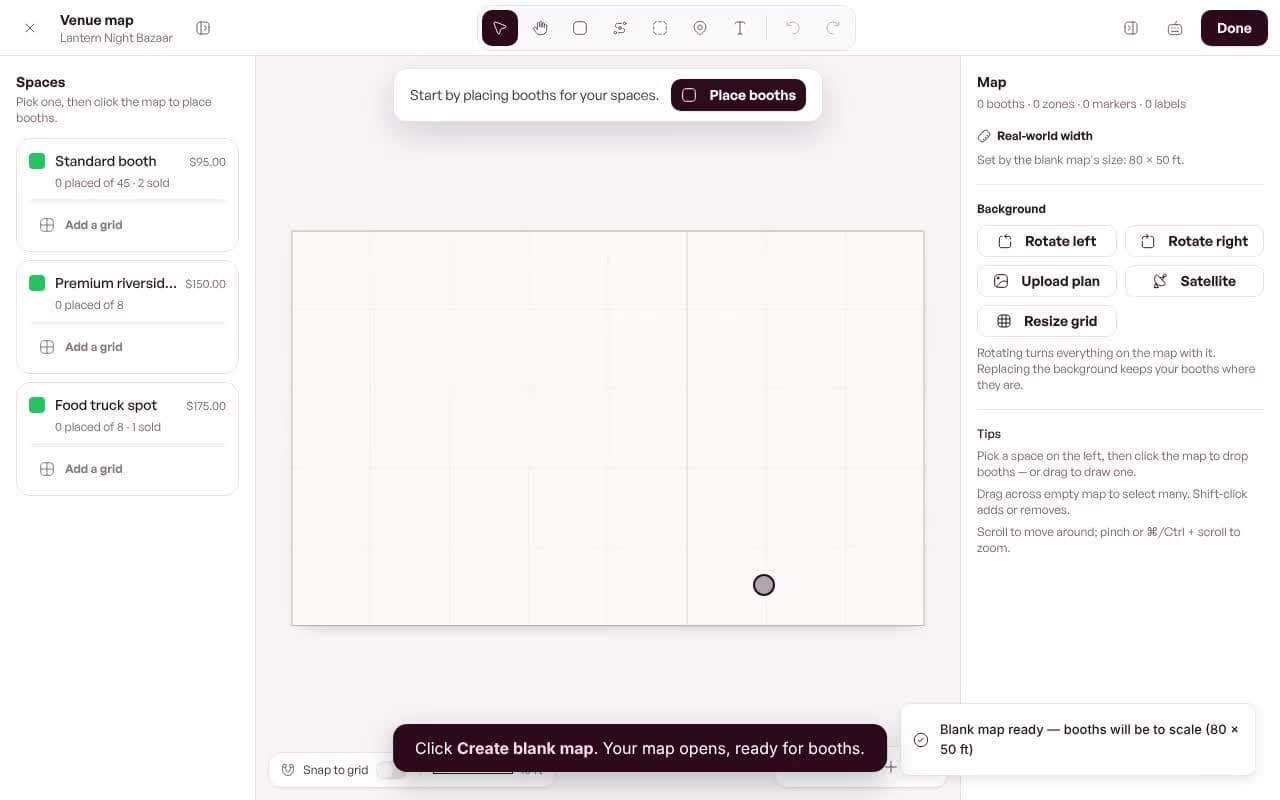
2. Start your map
Upload a floor plan, use a satellite view, or a blank grid.
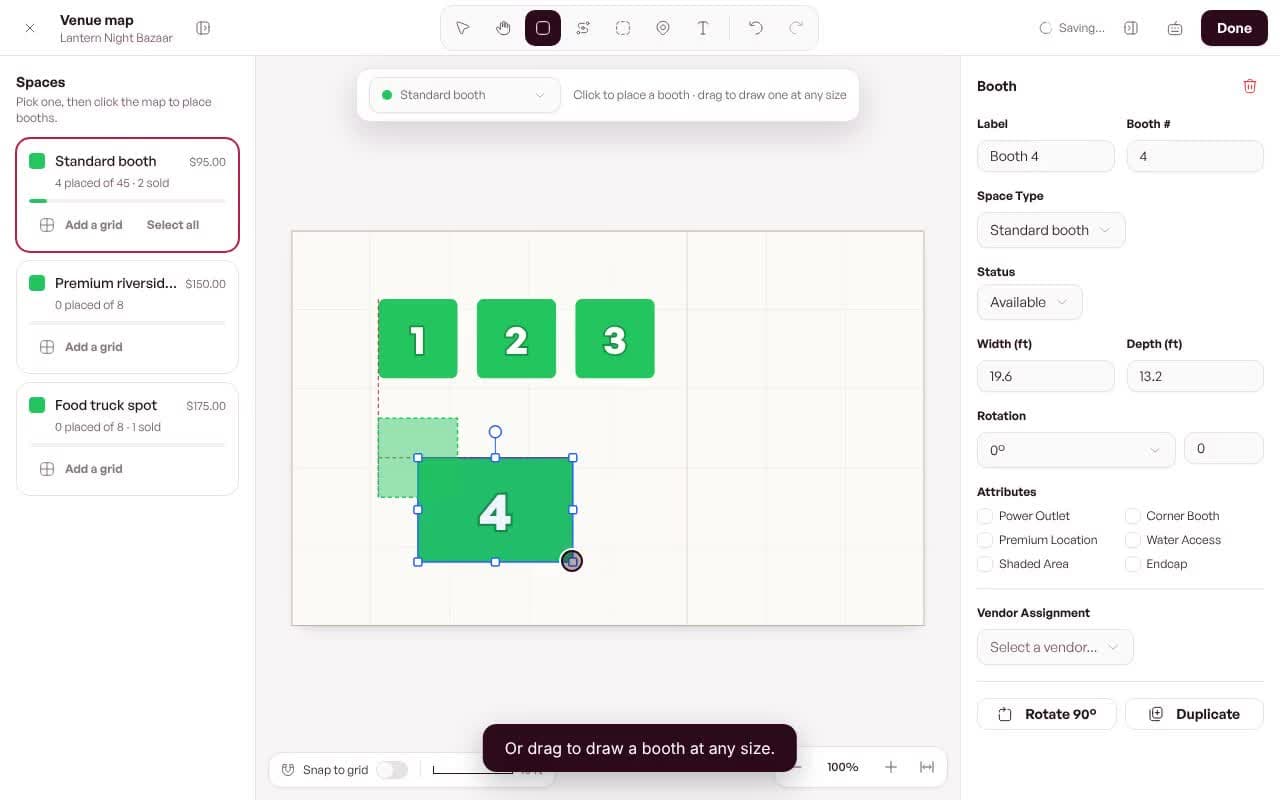
3. Place booths
Click to drop a booth, or drag to draw one.
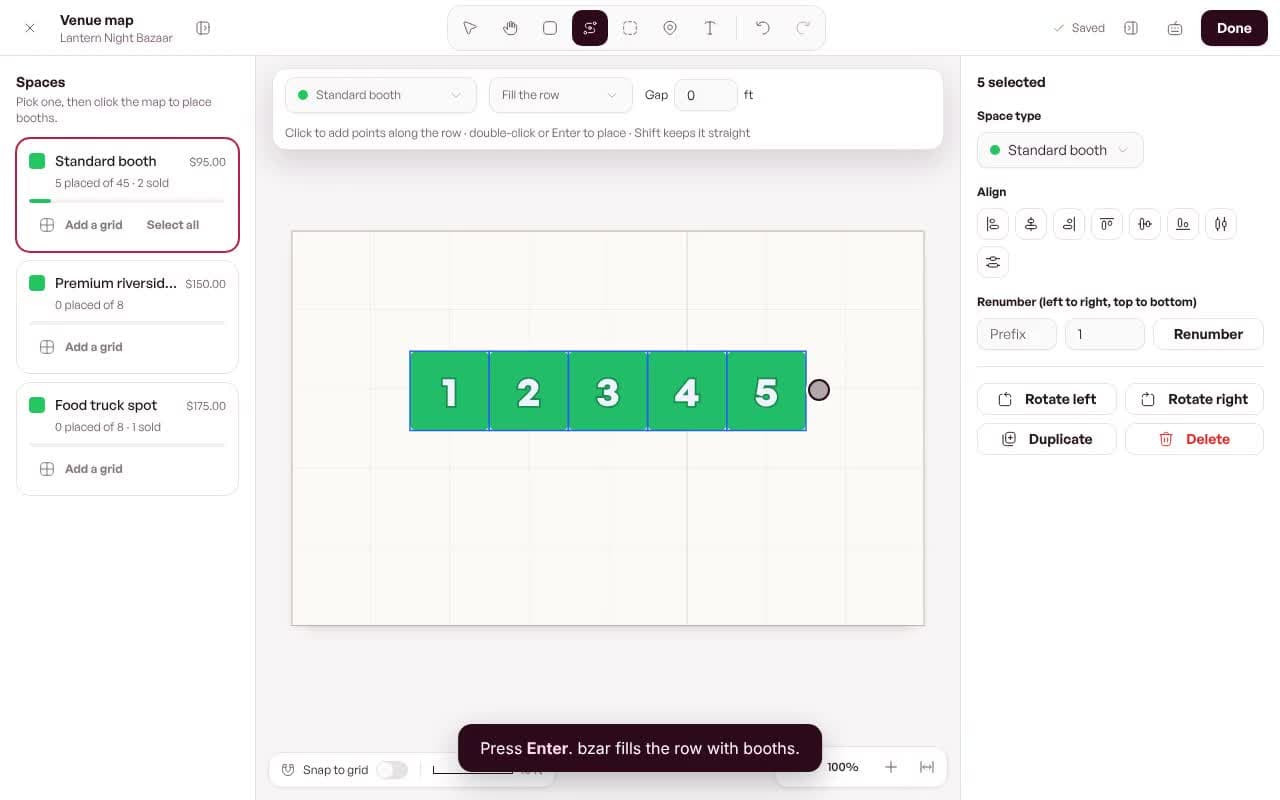
4. Place a row
A whole row of booths in two clicks.
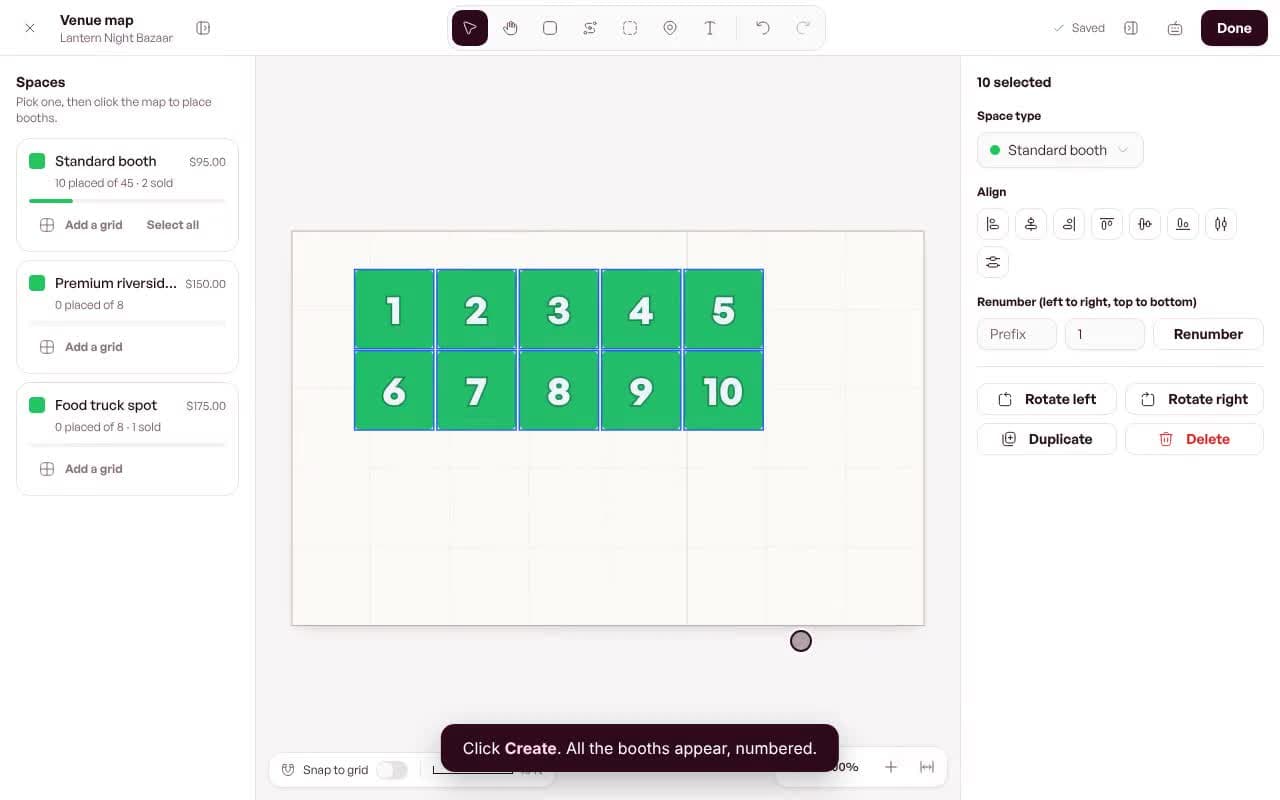
5. Add a grid
Rows and columns of booths at once.
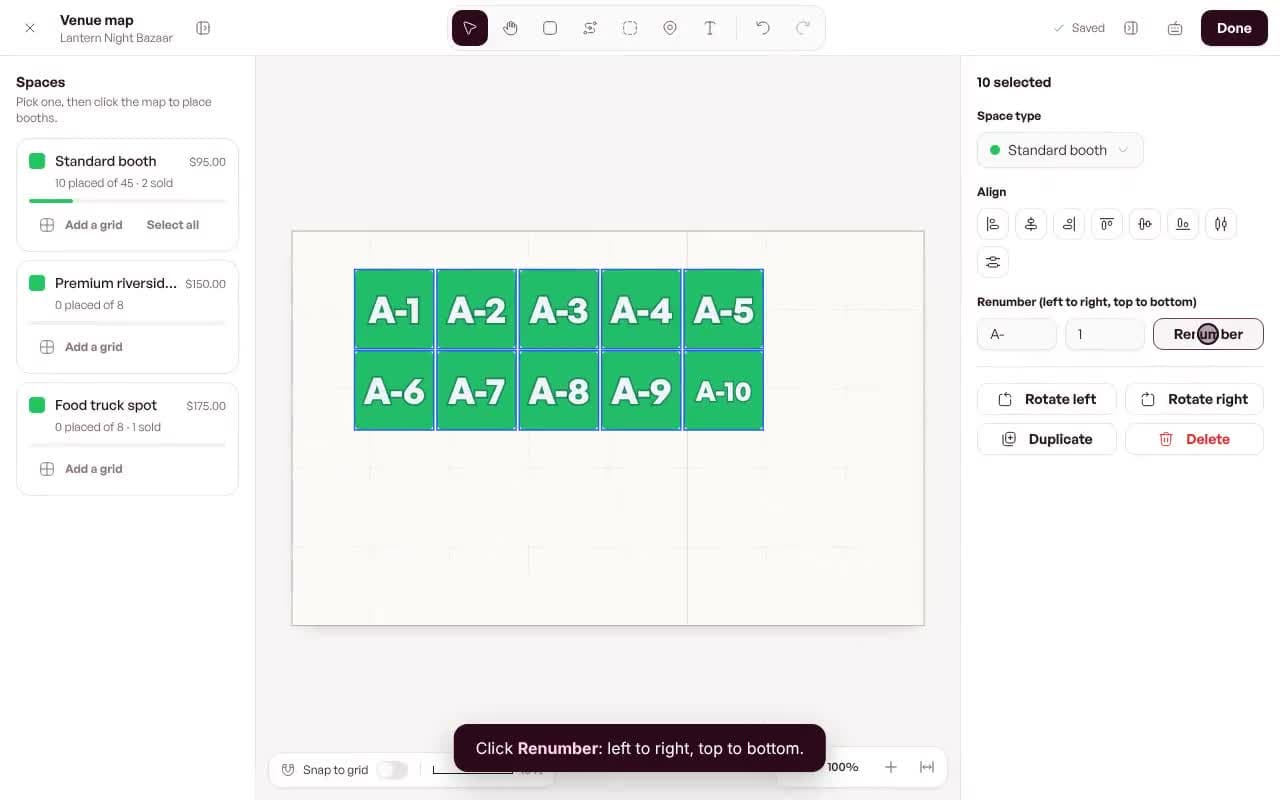
6. Number your booths
A-1, A-2, A-3… in one click.
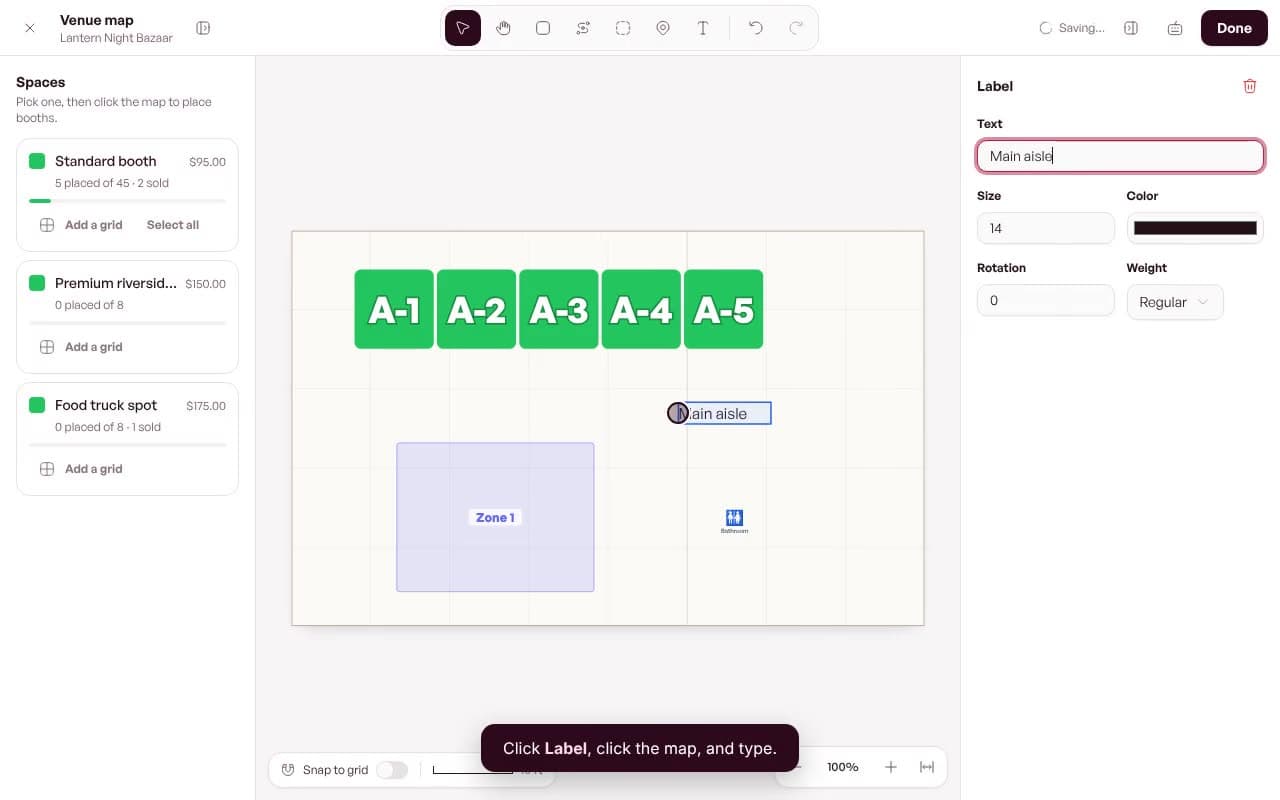
7. Zones, markers and labels
Food court, restrooms, entrances.
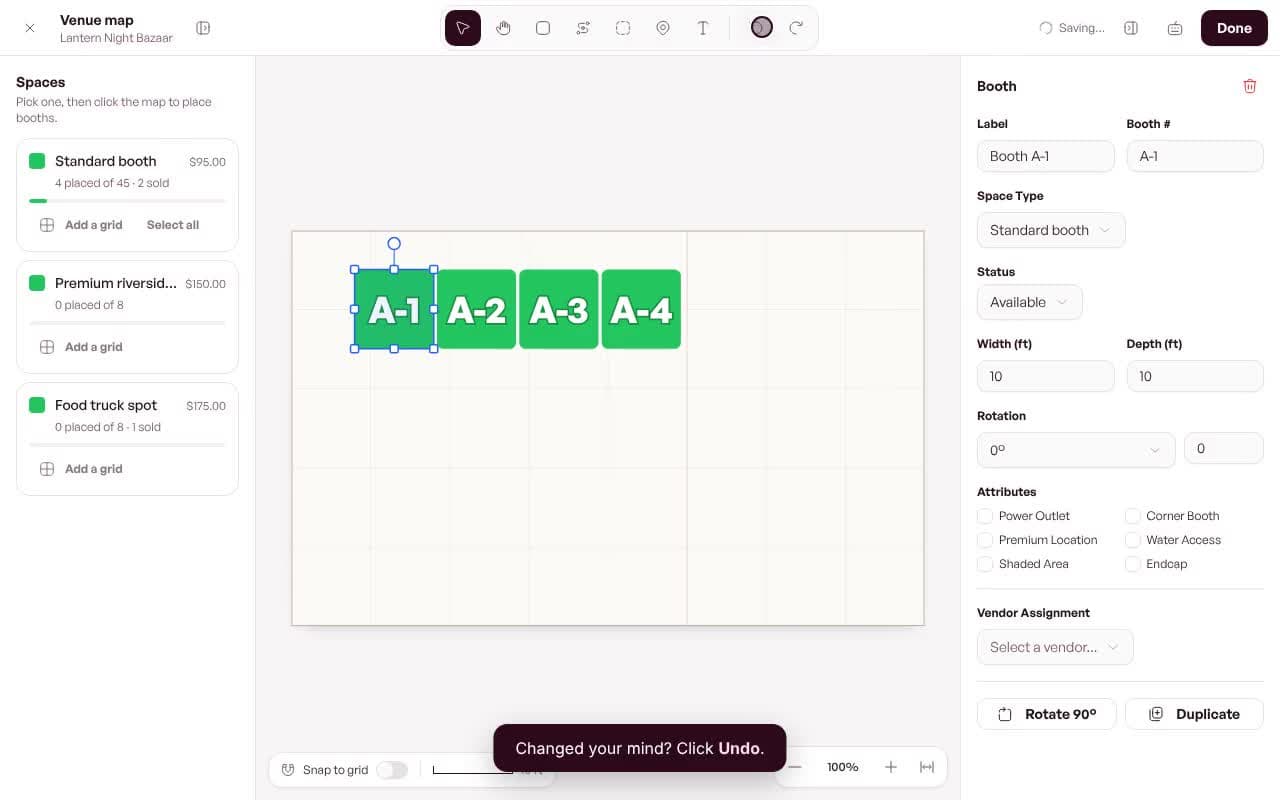
8. Move, rotate and undo
Fix anything. Nothing is permanent.
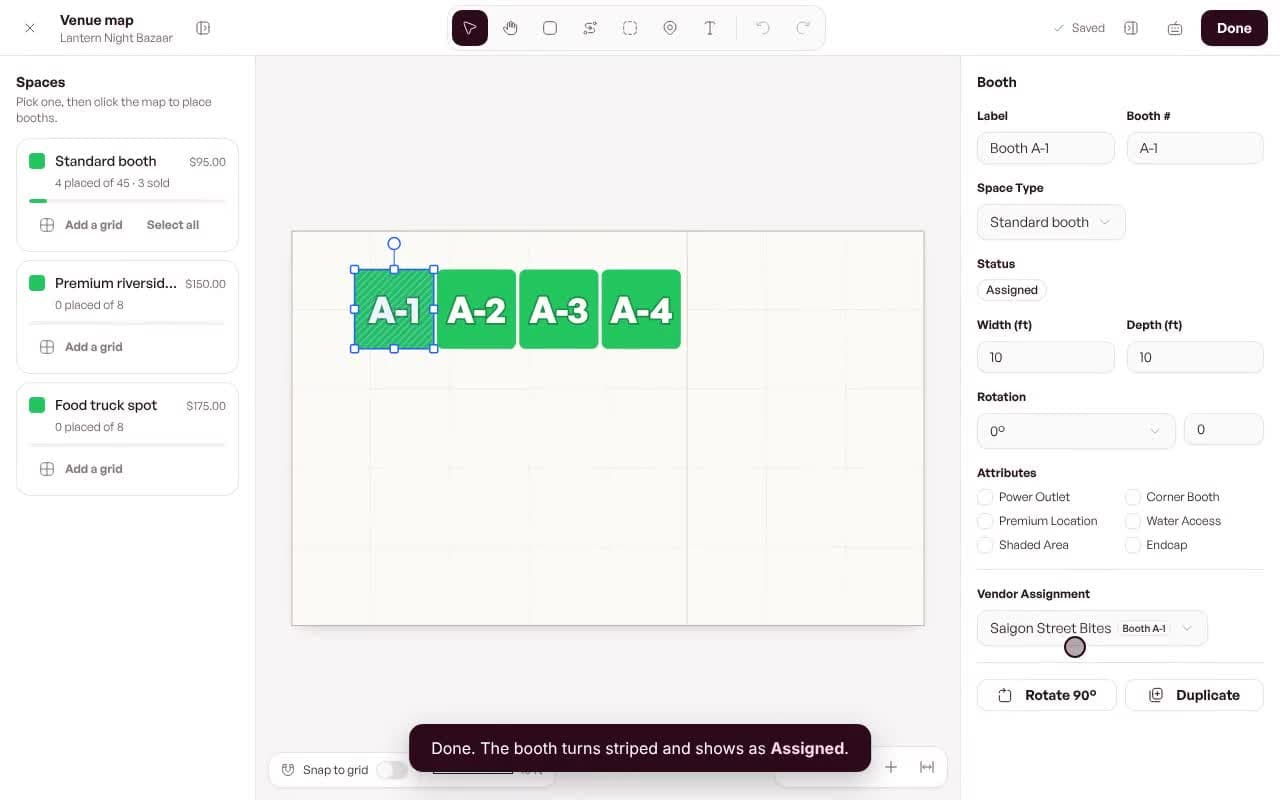
9. Assign vendors
Put each approved vendor in a booth.
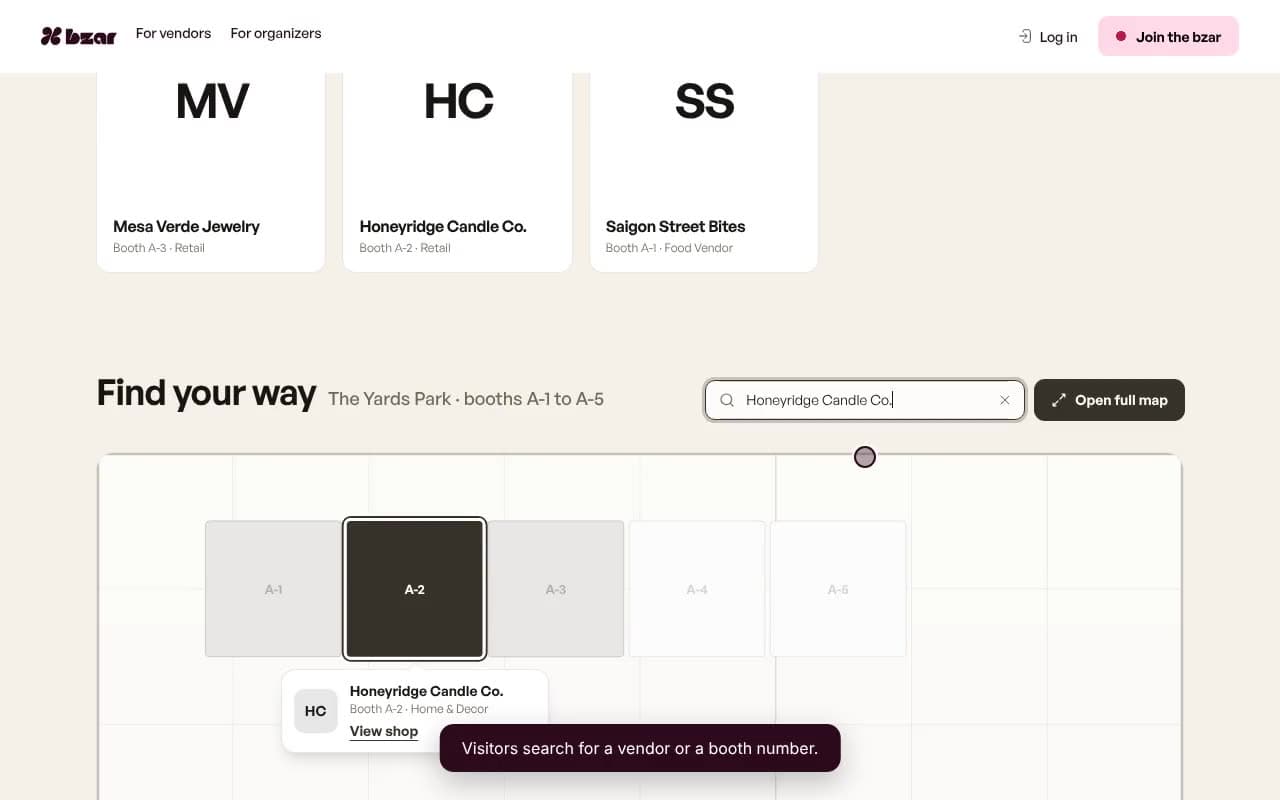
10. What visitors see
The map on your event page.
Best on a computer
The map editor needs a screen at least 768 pixels wide, like a laptop or a tablet held sideways.